Sign Up
Register on AIQ3DStudio with a Developer AccountAfter you have registered you can insert your personal datas and upgrade to premium account
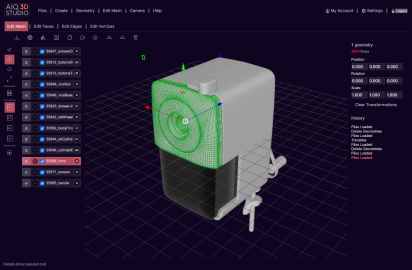
In the Edit Meshes window, in the Geometry Properties section, there is the animation section for the selected geometry. Here there is displayed the selected animation title, the duration and number of frames of the selected animation. There are also two buttons for creating or deleting keyframes for selected geometry.
A keyframe can store the geometry's position, rotation, scale, and visibility all at once.
To create a keyframe follow the next steps:
- Select an animation from the animations list
- Select the geometry that you want to animate
- Move the timeline range cursor to the desired frame
- Set the position, rotation, scale, and visibility of the selected geometry.
- Press Set Keyframe button
When you create a keyframe, it will instantly appear above the timeline as a small box displaying the frame number. You can click this boxes to jump to the corresponding keyframe.
In the geometry's properties window the position, rotation, scaling, and visibility values will be displayed according to the selected keyframe. You can update this values from the same Set Keyframe button.
Also, when cliking one keyframe, the Delete Keyframe button becomes active, so you can remove the selected selected keyframe.
Keep in mind that the visibility of the geometry is also used by the assemblies in which it is selected, so to set keyframes for it it is good to create a parent geometry that controls the visibility.
The geometries position, rotation, scale, and visibility will be interpolated linear between keyframes, resulting the animation.
All created animations will be stored when saving the 3D scene.
* Set keyframes for the selected geometry